One of the best things about static sites hosted on AWS is how easy it is to extend them. My main Jekyll blog (theclouddevopslearningblog.com) runs from an S3 bucket behind CloudFront, but I recently wanted to host a standalone JavaScript single-page application (SPA) on a subdomain:
https://breweriesnearme.theclouddevopslearningblog.com
Here’s exactly how I set it up.
1. Creating a New S3 Bucket for the Subdomain
The first step was to create a dedicated S3 bucket to hold the SPA build. Following AWS best practices:
- Bucket name:
breweriesnearme.theclouddevopslearningblog.com - Block all public access: ✅ ON
- Static website hosting: ❌ Disabled (we’ll use CloudFront instead)
I uploaded the build artifacts (index.html, main.js, assets/, etc.) directly into the bucket root.
💡 Tip: Make sure
index.htmlis at the root of the bucket, not in a subfolder likedist/, unless you plan to set a CloudFront origin path.
2. Requesting an SSL/TLS Certificate in ACM
CloudFront requires certificates to be in the us-east-1 region, so I switched to N. Virginia and requested a new cert for:
breweriesnearme.theclouddevopslearningblog.com
I used DNS validation and, because the domain is managed in Route 53, ACM automatically created the necessary CNAME record. Once validation succeeded, the certificate was ready to attach.
3. Setting Up the CloudFront Distribution
Next, I created a new CloudFront distribution to serve the SPA.
Key settings:
- Origin Domain: S3 regional endpoint (not the website endpoint)
- Origin Access Control (OAC): Enabled, to keep the S3 bucket private
- Viewer Protocol Policy: Redirect HTTP → HTTPS
- Alternate Domain Name (CNAME):
breweriesnearme.theclouddevopslearningblog.com - SSL Certificate: Custom ACM certificate from step 2
- Default Root Object:
index.html(⚠️ no leading slash) - Compression: Enabled
🔁 SPA-Friendly Error Pages
Because SPAs handle routing client-side, I needed to configure CloudFront to serve index.html even when a 403 or 404 occurs:
- 403 → 200 →
/index.html - 404 → 200 →
/index.html
This ensures deep links like /brewery/42 work correctly.
4. Bucket Policy for CloudFront Access
With OAC enabled, I updated the S3 bucket policy to allow CloudFront to read objects:
{
  "Version": "2012-10-17",
  "Statement": [
    {
      "Sid": "AllowCloudFrontOACRead",
      "Effect": "Allow",
      "Principal": { "Service": "cloudfront.amazonaws.com" },
      "Action": "s3:GetObject",
      "Resource": "arn:aws:s3:::breweriesnearme.theclouddevopslearningblog.com/*",
      "Condition": {
        "StringEquals": {
          "AWS:SourceArn": "arn:aws:cloudfront::<ACCOUNT_ID>:distribution/<DISTRIBUTION_ID>"
        }
      }
    }
  ]
}
5. Adding the Subdomain in Route 53
Finally, I added a new DNS record in Route 53:
- Record type: A (Alias)
- Name:
breweriesnearme - Target: My CloudFront distribution
Once propagation completed, the subdomain pointed to CloudFront and the SPA became publicly accessible.
6. Common Gotchas (and How I Fixed Them)
- AccessDenied at root: I initially saw an
AccessDeniederror when visiting/. The fix was making sure Default Root Object was set toindex.html(without a slash). - Certificate validation not showing: The first time I requested the cert, I did it in the wrong region (
ap-southeast-2). Certificates for CloudFront must be inus-east-1.
🧰 CI/CD Deployment
I set up a GitHub Actions pipeline to automatically build and deploy the SPA to S3 and invalidate the CloudFront cache:
name: Deploy Breweries Near Me SPA

on:
  push:
    branches: [ master ]

permissions:
  contents: read

jobs:
  deploy:
    name: Build and Deploy SPA
    runs-on: ubuntu-latest

    steps:
      - name: Checkout repository
        uses: actions/checkout@v4

      - name: Setup Node.js
        uses: actions/setup-node@v4
        with:
          node-version: 20

      - name: Install dependencies
        run: npm ci

      - name: Build application
        run: npm run build

      - name: Configure AWS credentials
        uses: aws-actions/configure-aws-credentials@v4
        with:
          aws-access-key-id: $
          aws-secret-access-key: $
          aws-region: ap-southeast-2

      # Upload static assets from dist/ (immutable cache)
      - name: Upload dist/ to S3
        run: |
          aws s3 sync dist/ s3://$/ \
            --delete \
            --cache-control "public,max-age=31536000,immutable"

      # Upload images from img/ (long cache but not immutable)
      - name: Upload img/ to S3
        run: |
          aws s3 sync src/img/ s3://$/img/ \
            --delete \
            --cache-control "public,max-age=31536000"

      # Upload index.html separately with no-cache
      - name: Upload index.html
        run: |
          aws s3 cp src/index.html s3://$/index.html \
            --cache-control "no-store" \
            --content-type "text/html"

      - name: Invalidate CloudFront cache
        run: |
          aws cloudfront create-invalidation \
            --distribution-id $ \
            --paths "/*"
7. Application Changes: Updating the App and Migrating to OpenBreweryDB
I wrote BreweriesNearMe as a standalone app (was previously deployed and hosted on a raspberry pi at home), as part of some study years ago (I was doing a Functional Programming in JavaScript course using the Rambda library). The code for this app is pretty cool, as it used the hyperscript-helpers library, which allows you to assign the css class for each element where it is being coded via helper functions (making the styling much more readable, than normal CSS, and for my purposes, was definitely sufficient), e.g:
function fieldSet(labelText, inputValue, oninput) {
    return div({ className: 'w-80'},
    [
        label({ className: 'db mb1 mw-80' }, labelText),
        input({
            className: 'pa2 input-reset ba w-100 mb2 br3',
            id: 'addressSearch',
            type: 'text',
            value: inputValue,
            oninput
        }),
    ]);
}
Switching from the proprietary BreweryDB API to the open, community-driven OpenBreweryDB required several code and data handling changes. In my previous blog, I wrote how I scraped, enriched and then added data to this project, so I won’t go over it again today. However, while cutting the source over was straight-forward, there were a few things that I had to update to get everything working smoothly:
🔄 API Endpoint & Data Model Changes
- API URL: Updated all fetch calls to use the OpenBreweryDB REST endpoints instead of the old BreweryDB URLs.
- Field Names: OpenBreweryDB uses different field names (e.g.,
name,street,city,state,postal_code,website_url,latitude,longitude). I refactored the code to map and display these new fields. - No API Key Needed: Removed all authentication logic and API key handling, since OpenBreweryDB is public. In fact, my previous authenticated calls through to BreweryDB.com were proxied via an AWS Lambda function to abstract the API auth side of things altogether.
🗺️ Address & Location Handling
- Address Formatting: Adjusted the address formatting logic to handle OpenBreweryDB’s fields, which sometimes differ from BreweryDB (e.g.,
address_1vsstreet,state_provincevsstate). - Geolocation: Ensured that the app gracefully handles missing or partial location data, since not all breweries in OpenBreweryDB have latitude/longitude.
📏 Distance Calculation
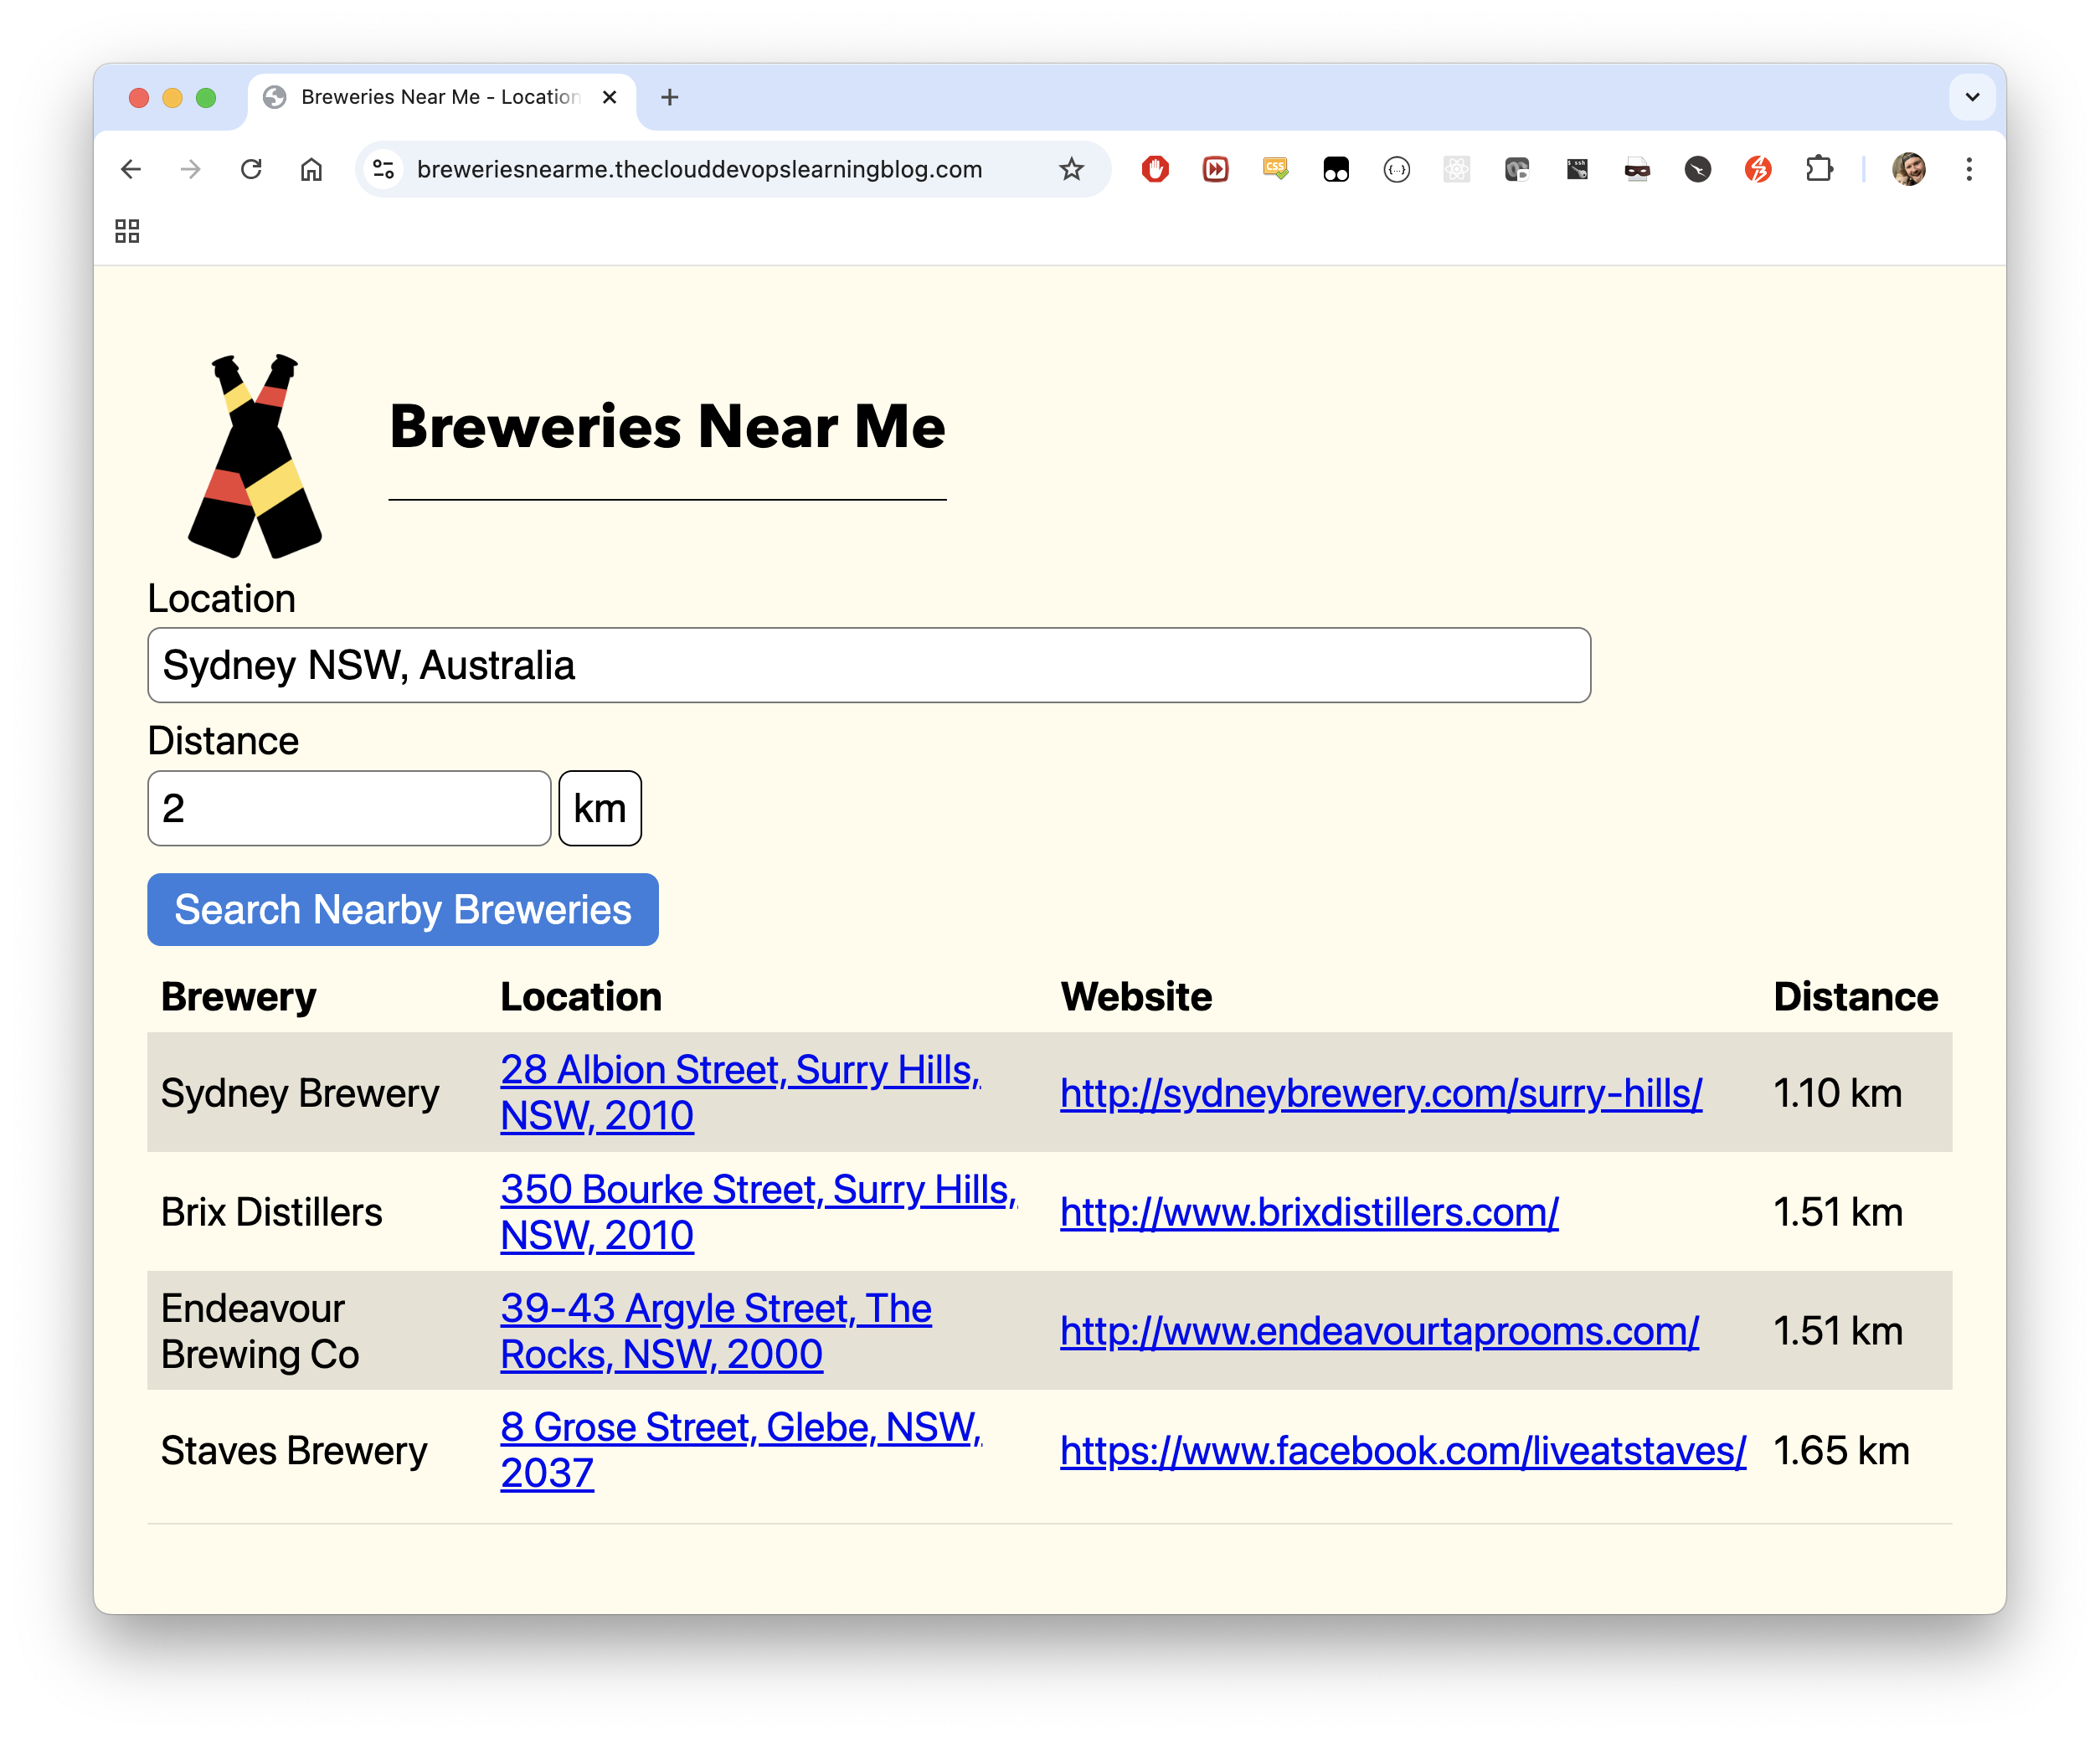
- Distance Calculation: Since OpenBreweryDB doesn’t provide distance-from-user, I implemented a Haversine formula in the frontend to calculate the distance between the user’s search location and each brewery’s coordinates.
- Unit Selection: Preserved support for both kilometers and miles.
- Filtering by Distance: Updated the logic so that breweries are filtered by the selected radius before rendering, and the “No breweries to display within the selected distance.” message is shown if none match. The distance calculation is now performed for each brewery before filtering and deduplication, ensuring the UI is always accurate and user-friendly.
🧹 Deduplication
- Duplicate Results: OpenBreweryDB sometimes returns duplicate or near-duplicate breweries (with slight name or address variations - kind of my bad given I created the initial dataset 💀). I added a deduplication step in the frontend, matching on address, website, and distance, to ensure only unique breweries are shown.
🖥️ UI & Table Rendering
- Table Columns: Updated the UI to show the new fields, and ensured links (like website and Google Maps) use the correct data. Sadly, I had to remove the Image field, as this information isn’t supported in the OpenBreweryDB API (perhaps room to add improvements later!).
- Error Handling: Improved error handling for missing data and empty results.
🧪 Testing & Edge Cases
- Deep Links: Verified that SPA routing still works for direct links to brewery detail pages.
- No Results: Ensured the app displays a friendly message if no breweries are found for a given search or if none are within the selected distance.
With these changes, the app now works seamlessly with OpenBreweryDB, is easier to maintain, and is free from API key or quota restrictions.
Final Thoughts
This project was a great reminder of how flexible AWS’s static hosting model is. With just a few services — S3, CloudFront, ACM, and Route 53 — I was able to stand up a completely separate React application under the same domain as my Jekyll blog, with full HTTPS support, CDN caching, and SPA-friendly routing.